No products in the cart.
en
Revolutionizing the screen printing industry through cutting-edge technology and quality service
Phone: +1 847-367-9760
Anatol Equipment Manufacturing Co.
1429 S Shields Dr
Waukegan, IL 60085
Revolutionizing the screen printing industry through cutting-edge technology and quality service
Anatol Equipment Manufacturing Co.
1429 S Shields Dr
Waukegan, IL 60085

Keeping your customers happy depends on high quality prints – here are some ways to achieve them!
Every screen printing shop has the goal of producing quality prints with as few misprints as possible. Achieving that goal not only means honing your skills as a printer, but also following some industry best practices to avoid problems such as pinholes, blurry prints and improper curing.
In a previous blog, 7 Screen Printing Practices That Will Improve Your Final Product, we outlined some practices you can implement to cut down on misprints. Today, we’re bringing you seven more.
It’s a very basic practice, but it’s one many screen printing shops neglect: Keep all areas of your screen printing shop clean. Dust and debris can interfere with all areas of your screen printing operation, from blocking light when you’re exposing screens to gumming up your screen printing press. Cans of ink left open can accumulate debris that will end up in your final print. Dirt can transfer from the surfaces of your shop or your employees’ hands onto garments. The simple act of tidying your shop at the end of every day and wiping down surfaces weekly can ultimately save you from misprints and stained garments that cost you money.
For your emulsion to cling to your screens, you need to start with a clean surface. When reclaiming your screens, use screen printing chemicals intended for the job; other products might remove the emulsion, but unless you’re using the right chemicals, you can be left with debris on your screen that will prevent the next coat of emulsion from adhering properly. Don’t neglect degreasing your screens before you recoat them, as this step will help to ensure that there isn’t anything on the screen that will interfere with the emulsion.
Once your screens are cleaned and prepped, you need a great stencil to create a great print. A great stencil requires a thick, smooth application of emulsion that will endure through your printing process. Apply one coat of emulsion to the print side of the screen and then to the ink side with a scoop coater. With your screen held upright, place the scoop coater full of emulsion at the bottom of the screen. Tip the scoop coater until the emulsion floods the bottom of the screen. With firm, even pressure, slowly pull the scoop coater up the screen. Stop about an inch below the top of the screen, then tip the scoop coater back, sheering the emulsion away with the blade of the coater. If you require a thicker stencil for a heavier ink deposit, you can add an additional coat of emulsion to the print side of the screen. Let the emulsion dry in a clean, dry place away from UV light. The screens should be dried with the print side down.
If your colors aren’t lined up correctly, your print won’t turn out right. Take the time to register your press before your print run. You can add registration marks before you print; it’s a step some printers will skip, but it’s well worth the time. One easy way to check your registration is to print the entire image in black, then rotate the print around the press to make sure each screen lines up properly.
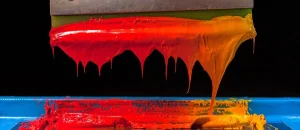
Many inks market themselves as “ready to print,” but it’s rarely the case that you can open a bucket of ink and just print. Ink, especially if it’s been sitting, requires some prep work. Before your print, your ink should be thoroughly mixed to make sure it has a smooth, easy consistency. You’ll have to evaluate whether you need an additive for your print, to reduce the viscosity of the ink, lessen the risk of color bleeding or create a softer hand. To get the most out of your inks, and to improve the quality of your inks, always take the time to prep your i
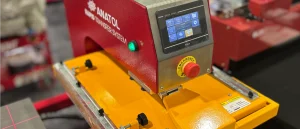
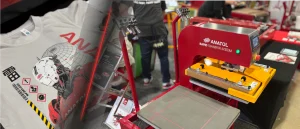
Anatol’s heavy duty Formulator ink mixer will take
the work out of preparing your inks for printing.
You can register your press and measure out your image placement perfectly, but if your shirts aren’t loaded properly, your image will be off centered or crooked. Every press operator has his or her own technique for loading the press. Allow whomever is loading the press on a given press run to set up the station according to their preferences. They can mark platens to identify where the collar of a shirt should hit or where the center of the substrate should be. If you’re printing on a new substrate, let your press loader practice with the substrate in real time. If your printing and your garments just seem to be a little off no matter what the press operator does, consider adjusting the speed of the press; often loading problems are created by a press that is running too fast to be loaded well.
We’ve often espoused the benefits of a test print for every project. After your successful press run, there’s one other thing you can do to ensure the success of your entire press run: Take measurements of a random sample of prints during your press run. Use rulers to check the placement of your images. Use thermometers or temperature tape to check your curing temperatures. Use your Pantone color matching system to be sure that the final color of your print matches what your customer ordered.
You can save money, time and frustration in your screen printing shop by cutting down on the number of misprints you generate. The best way to reduce errors and waste it to return to the basic best practices of screen printing. By following these principles, you can help make sure that your prints are free from a variety of blemishes that will make them unacceptable to your customers.
Your message was successfully sent!