
Revolutionizing the screen printing industry through cutting-edge technology and quality service
Anatol Equipment Manufacturing Co.
1429 S Shields Dr
Waukegan, IL 60085


Revolutionizing the screen printing industry through cutting-edge technology and quality service
Anatol Equipment Manufacturing Co.
1429 S Shields Dr
Waukegan, IL 60085

For great quality screen prints, you need ink that’s ready to do the job – so take some time to prepare it!
Achieving the right consistency often poses the greatest challenge. Ready-for-use water-based or discharge inks might only require a light stir before you begin your press run. The consistency of plastisol inks, however, can vary widely, and plastisol generally requires some additional work to achieve the right texture. Inks that have more pigment or that have been left to sit for awhile can be especially thick and difficult to work with, especially if you’re printing manually.
For proper printing, plastisol ink needs to be heavy enough to maintain its viscosity throughout the print run while still being thin enough to penetrate the screen easily and evenly. If a stir stick can stand up in the ink, it’s too thick. At the right consistency, a stir stick pulled from the bucket of ink may have a bit of ink drip, but most should remain on the stick. There should not be a thick thread of ink between your stirring device and the ink container.
To achieve the right consistency for your plastisol inks, you can run the ink through an ink mixer to see if it restores the texture of the ink. If the ink remains too thick, you can mix your high-opacity ink with a medium-opacity ink of the same color, in approximately a 3-to-1 ratio. Just test to make sure your ink has not lost too much of its opacity for your print job. You can also mix your ink with a soft-hand base at the same ratio, but this will reduce the ink’s opacity by a greater degree.

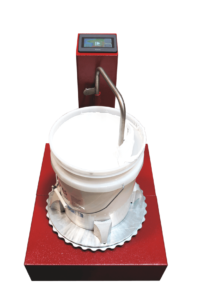
Don’t want to mix your ink by hand? Let an ink mixer
like the Anatol Formulator do the work for you!
Of course, there is ink reducer made just for the task of thinning your plastisol, but many printers are wary of using it unless absolutely necessary. While manufacturers’ recommendations are usually to add 10 to 15 percent reducer to your ink, many screen printers recommend adding less. Ink reducer can cause fine details, such as lines or process dots, to expand and blur. It can reduce detail and it can increase the risk of dye migration during the curing process.
Of course, it you plan to create your own ink color, it’ll take some preparation. You might choose to create a custom color if you require a small amount of one color for a one-off print job. Many ink manufacturers provide color formulas that can help you determine how to achieve the proper ink color.
When mixing inks for color, be sure to mix the ink in or on a non-absorbent surface, and use tools made from non-absorbent materials like metal. If you use a material that absorbs moisture, such as wood or cardboard, the moisture will be drawn from the ink as you mix, possibly disrupting the ink’s consistency.
Another reason to prepare your ink is to create a special printing effect. There are a variety of ink additives to change the properties of your ink. Mixing additives into your ink can create a puffy effect, a glossy finish or a softer hand. A metallic base allows you to add glitter or metallic powder to your ink. A flattener can cut the gloss of plastisol for a suedge effect.
Other additives will help you achieve other outcomes with your ink. Occasionally, you might need to add a thickening paste. If you’re printing a color process job or halftones, you might add a flow control additive, which reduces the amount of ink that sticks to the back of the screens and interferes with wet-on-wet printing.
Ultimately, all inks take some preparation for screen printing. Even if your ink is the desired color and consistency, and you don’t require an additive to help with an effect or process, your ink should be prepared! Always mix your ink, either by hand or in an ink mixer, to make sure the color and texture are consistent throughout the ink. Preparing your ink before it hits the screen can save you from halting a job to redo prints or clean screens because you discovered too late that the ink wasn’t ready for the job.
For more tips on getting your ink ready to print, check out these blog posts:
Color Matching Ink for Screen Printing: Get the Best Results!
Your message was successfully sent!