
Revolucionando la industria de la serigrafía a través de tecnología de punta y servicio de calidad
Anatol Equipment Manufacturing Co.
1429 S Shields Dr
Waukegan, IL 60085


Revolucionando la industria de la serigrafía a través de tecnología de punta y servicio de calidad
Anatol Equipment Manufacturing Co.
1429 S Shields Dr
Waukegan, IL 60085

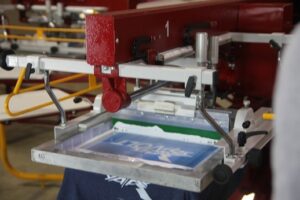
Printing with white ink can be deceptively difficult – here are some tips to help you out! There are several reasons white ink is notoriously tricky: It has more pigment than darker inks, so it’s thicker and more difficult to work with. You need to lay down a thicker layer of ink to create an opaque white print on a dark substrate. There are a lot of different white inks on the market, and using the wrong white ink can have a negative impact on your print.
While screen printers differ on their approach to printing with white ink on dark colors, here is our guide to printing with white ink.
Finding the right white ink can be more difficult than it seems, as there are a surprising amount of white inks on the market. While it might be tempting to pick one white for your shop and stick with it for all jobs, you’ll have much better success with your white prints if you pick the right ink for your substrate. White ink options include:
On top of the type of white ink you choose, you’ll also have to find a brand that you prefer. Different white inks have different levels of opacity, different levels of bleed resistance, different flash-curing characteristics and different hand feels. Choosing which brand of white ink to print with generally comes down to personal preference, and a shop’s preferred white usually must be found through trial and error.

Once you have found the right white ink for the job in your preferred ink brand, printing with white ink still takes some special care. First, because white inks have more pigment and a higher viscosity, you’ll want to do what you can to make the ink easier to work with. Because you’ll probably want your white print to be opaque, you’ll have to make sure you’re laying down a thicker print. Finally, you will have to alter your curing process because white ink doesn’t always cure like other inks.
Here are some steps you’ll want to take when printing with white inks:
White ink does have a learning curve, and it can be surprisingly frustrating for new and seasoned screen printers alike. By choosing the right white inks and slightly modifying your production process, you can erase the frustration and turn out perfect white screen prints every time.
Looking for some more tips on choosing and preparing your ink? Check out these blogs:
Your message was successfully sent!